Introduction
Optimizing images is essential for faster website loading times and better user experience. This guide will walk you through the steps of optimizing images using Adobe Photoshop.
Step-by-Step Guide
1. Open Your Image in Photoshop
- Launch Adobe Photoshop.
- Open the image you want to optimize.
2. Check Image Size and Resolution
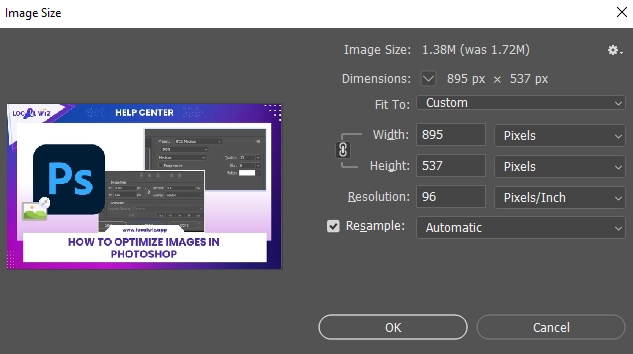
- Go to Image > Image Size.
- Adjust Dimensions: Resize your image to match the actual display size on the website. For example, if the image displays at 1200×900 pixels, resize to these dimensions.
Note: Avoid using excessively large dimensions for small display sizes, as this can unnecessarily increase file size and slow down load times.
3. Save for Web
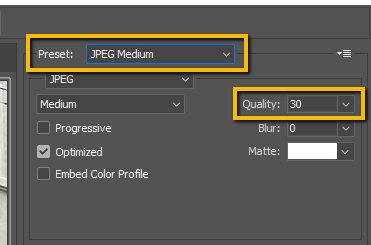
- Go to File > Save for Web (Legacy).
- Choose a Preset: Select the “JPEG Medium” preset for optimal quality and compression. You can also increase the Quality to 40-50 if you don’t want to lose more detail in the image that you are optimizing.
- Check Image Size: Verify that the image size meets your requirements. A good target is between 100KB and 300KB, with a maximum of 500KB.
Additional Tips
- Consider Your Image’s Purpose: If you’re optimizing images for web use, prioritize smaller file sizes to improve loading times. For print, higher resolution and larger file sizes may be necessary.
- Use a Consistent Naming Convention: Use a clear and consistent naming convention for your images to help with organization and identification.
- Test Your Optimized Images: After optimizing your images, test them on your website or other platforms to ensure they display correctly and load quickly.
By following these steps, you can effectively optimize your images for web use. This will help improve your website’s performance and user experience.