Introduction
This article will guide you through customizing the “Powered By Local Wiz” text displayed under the map section of your Local Wiz project. This allows you to replace it with your own branding or a link to your website.
Prerequisites
- You must be logged into the Local Wiz app.
- You should have a project already created and edited.
Steps
1. Access Project Settings
- In your Local Wiz app, open the project you want to modify.
- Scroll down until you find the section where you entered the project address.
- Tap on “Update Project” or “Save Project” to ensure any recent edits are saved.
2. Preview the Project
- Click on “Preview” to view your project as it would appear live.
3. Locate the "Powered By" Text
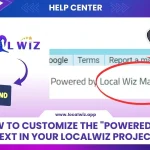
- Under the map section, you will see the text “Powered by Local Wiz app”.

4. Customize the Text (Optional)
- If you are an agency and don’t want to advertise Local Wiz, you can personalize this section.
5. Access Project Settings
- Go back to the project editing screen (if you navigated away).
6. Modify "Powered By" Text
- Hover on “Settings” from the Local Wiz app menu.
- Select “Projects” from the settings options.
- Scroll down to the bottom of the “Projects” settings page.
- Locate the fields labeled “Powered By Text” and “Powered By Link”.

7. Enter Your Customization
- In the “Powered By Text” field, enter the text you want to display instead of “Powered by Local Wiz app”.
- (Optional) In the “Powered By Link” field, enter a website URL if you want the text to be clickable and redirect users.
8. Save Changes
- Tap on “Save” to confirm your modifications.
9. Wait for Update
- Be aware that changes might take a few seconds to a minute to propagate.
10. Verify the Update
- Refresh your project preview.
- You should now see your customized text displayed under the map section.
- Clicking the text (if you entered a link) will redirect you to the specified URL.