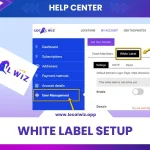
Step 1: Accessing White Label Settings
- Log into your LocalWiz account.
- Click on your profile name in the top right corner.
- Select “My Account.”
- Click on “User Management.”
- Switch to the “White Label” tab.

Step 2: Configuring Domain Settings
1. Understanding Domain and Subdomain
- Domain: Your primary website address (e.g., yourdomain.com).
- Subdomain: A specific section of your domain (e.g., app.yourdomain.com).
2. Setting Up DNS Records
- Access your domain registrar’s control panel.
- Find the DNS settings for your domain or subdomain.
- Create an A record with the following details:
- Host: @ (for domain) or your subdomain name (e.g., app)
- Points to: The IP address provided in the LocalWiz white label settings.

3. Entering Domain Information in LocalWiz
- In the “Domain” field, enter your desired domain or subdomain (without http:// or https://).
- Ensure you’ve set up the DNS records correctly before saving.
Step 3: Updating Email Address and Logo
- Email Address:
- Enter the email address that will be displayed in the app.
- Logo:
- Upload your desired logo image.
- Save Changes:
- Click the “Save Changes” button to apply the settings.
Additional Tips
- DNS Propagation: It may take some time for DNS changes to propagate. Be patient and allow for a few hours.
- Testing: Once the changes are applied, test the white-labeled app to ensure everything is working as expected.
- Troubleshooting: If you encounter any issues, refer to the LocalWiz support documentation or contact their support team.
Conclusion
By following these steps, you can effectively white-label your LocalWiz app and customize it to match your brand identity.
Remember to:
- Use clear and concise language.
- Break down complex steps into smaller, easier-to-follow substeps.
- Include screenshots or visual aids to enhance understanding.
- Proofread carefully to eliminate errors.
By adhering to these guidelines, you can create a comprehensive and user-friendly workflow article.